
Ever find yourself staring into the fridge at 6 PM, utterly uninspired, but craving something deeply satisfying, savory, and quick? What if you could have a restaurant-quality meal on the table in less time than it takes for delivery to arrive? This incredibly flavorful ground beef and rice dish is your answer. Forget bland, repetitive dinners. Cooking this at home isn’t just about saving money; it’s about unlocking a world of customizable flavor that hits all the right notes—sweet, savory, garlicky, and slightly spicy—while providing a balanced, comforting meal. It’s the perfect gateway to Korean-inspired flavors, offering a simpler, quicker alternative to classics like an Easy Bibimbap, but with the same soul-warming essence.
Table of Contents
Ingredients & Supplies
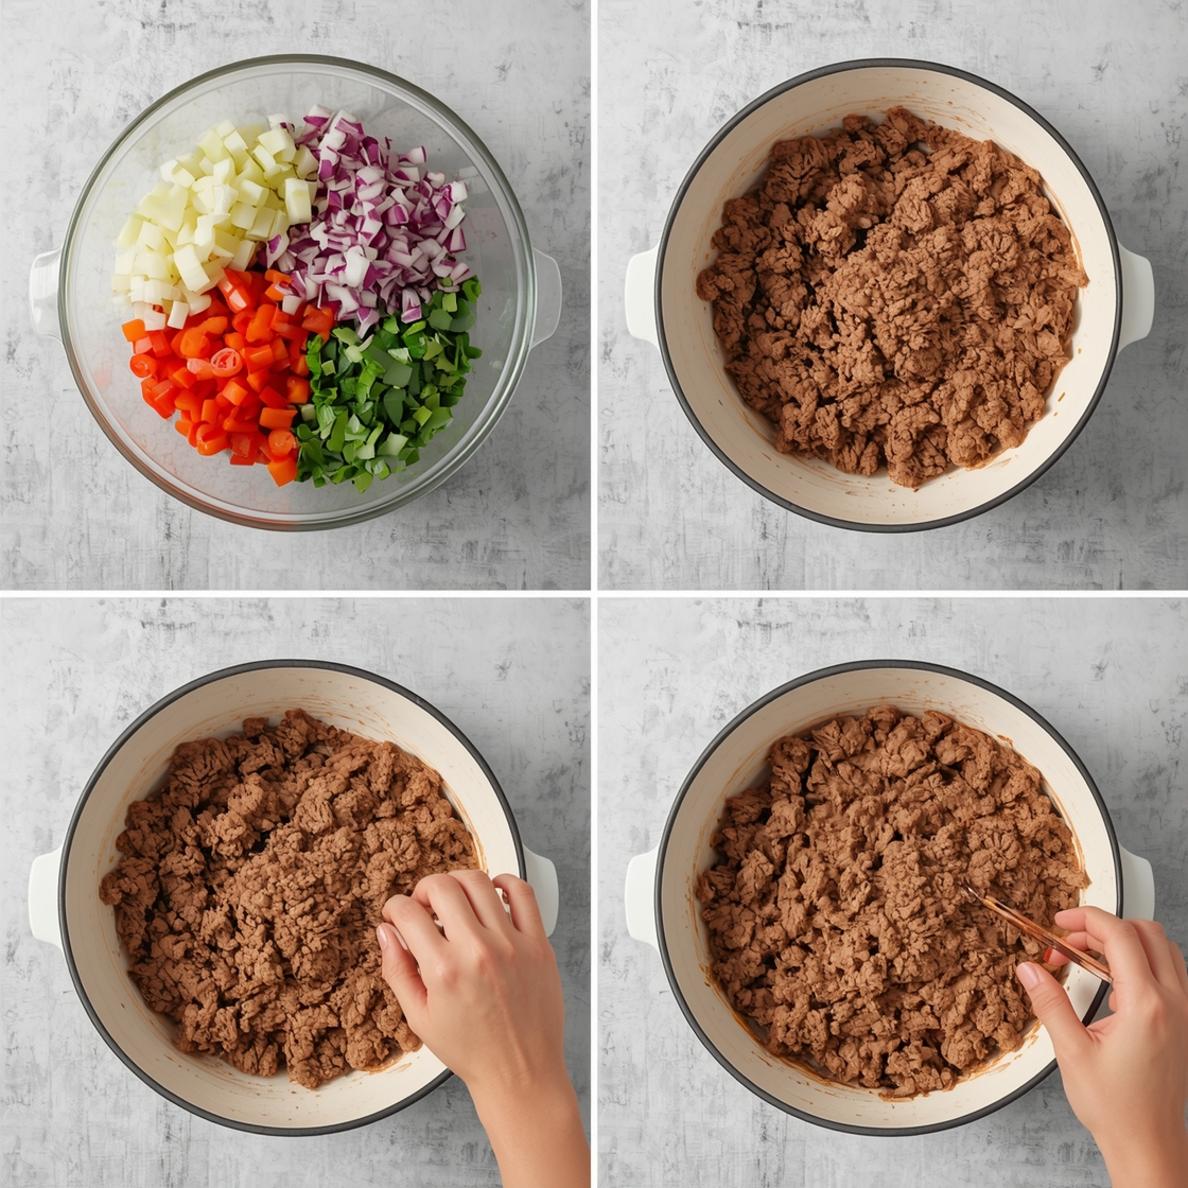
To create this delicious bowl, you’ll need a mix of pantry staples and fresh ingredients. Having everything prepped and ready (a concept known as mise en place) is the secret to a smooth, 20-minute cooking experience.
Ingredients:
- 1 lb lean ground beef (90/10 or 93/7 works best)
- 1/3 cup brown sugar (light or dark)
- 1/4 cup low-sodium soy sauce (or tamari for gluten-free)
- 1 tablespoon sesame oil
- 1 tablespoon minced fresh ginger
- 4-5 cloves garlic, minced
- 1/2 teaspoon crushed red pepper flakes (adjust to taste)
- 1 bunch green onions, thinly sliced (separate white/light green parts from dark green tops)
- 1 tablespoon neutral cooking oil (like avocado or canola)
- Cooked white rice, for serving
- Toasted sesame seeds, for garnish
Optional/Alternative Items:
- Protein: Ground turkey, chicken, or plant-based crumbles.
- Sweetener: Honey or maple syrup in place of brown sugar.
- Vegetables: Add 1 cup of matchstick carrots, sliced bell peppers, or spinach in the last 2 minutes of cooking.
- Spice: A dash of gochujang (Korean chili paste) for authentic heat.
Essential Tools:
- Large skillet or wok
- Wooden spoon or spatula
- Small mixing bowl
- Measuring cups/spoons
- Sharp knife & cutting board
Timing/Cooking Schedule

This recipe is famously fast. From the moment you pull out your skillet to the time you sit down to eat, you’re looking at about 20 minutes of total effort.
- Prep Time: 10 minutes (includes mincing garlic/ginger, slicing onions, mixing sauce)
- Cook Time: 10 minutes
- Total Time: 20 minutes
Context: Compared to traditional multi-component meals like a classic Easy Bibimbap, this streamlined ground beef and rice dish cuts the active cooking time by more than half. It’s the ideal schedule for a busy Tuesday night.
Step-by-Step Instructions
Follow these simple steps for a perfect result every time.
1. Prep & Mix: Start your rice cooker or pot of rice. In a small bowl, whisk together the brown sugar, soy sauce, sesame oil, ginger, garlic, and red pepper flakes. This is your powerhouse sauce. Slice your green onions, keeping the white/light green parts separate from the dark green tops.
2. Cook the Beef: Heat the neutral oil in your large skillet or wok over medium-high heat. Add the ground beef and the white/light green parts of the green onions. Break the beef apart with your spoon and cook until no longer pink, about 5-6 minutes. Tip: Don’t overcrowd the pan; cook in two batches if your skillet is small to ensure proper browning, not steaming.
3. Sauce It Up: Drain any excess fat from the beef. Reduce the heat to medium. Pour the pre-mixed sauce over the cooked beef. Stir well to combine, letting it simmer for 2-3 minutes until the sauce thickens slightly and coats every bit of beef. This step builds the deep, glossy flavor that defines this ground beef and rice dish and gives it that signature appeal similar to the saucy elements in an Easy Bibimbap.
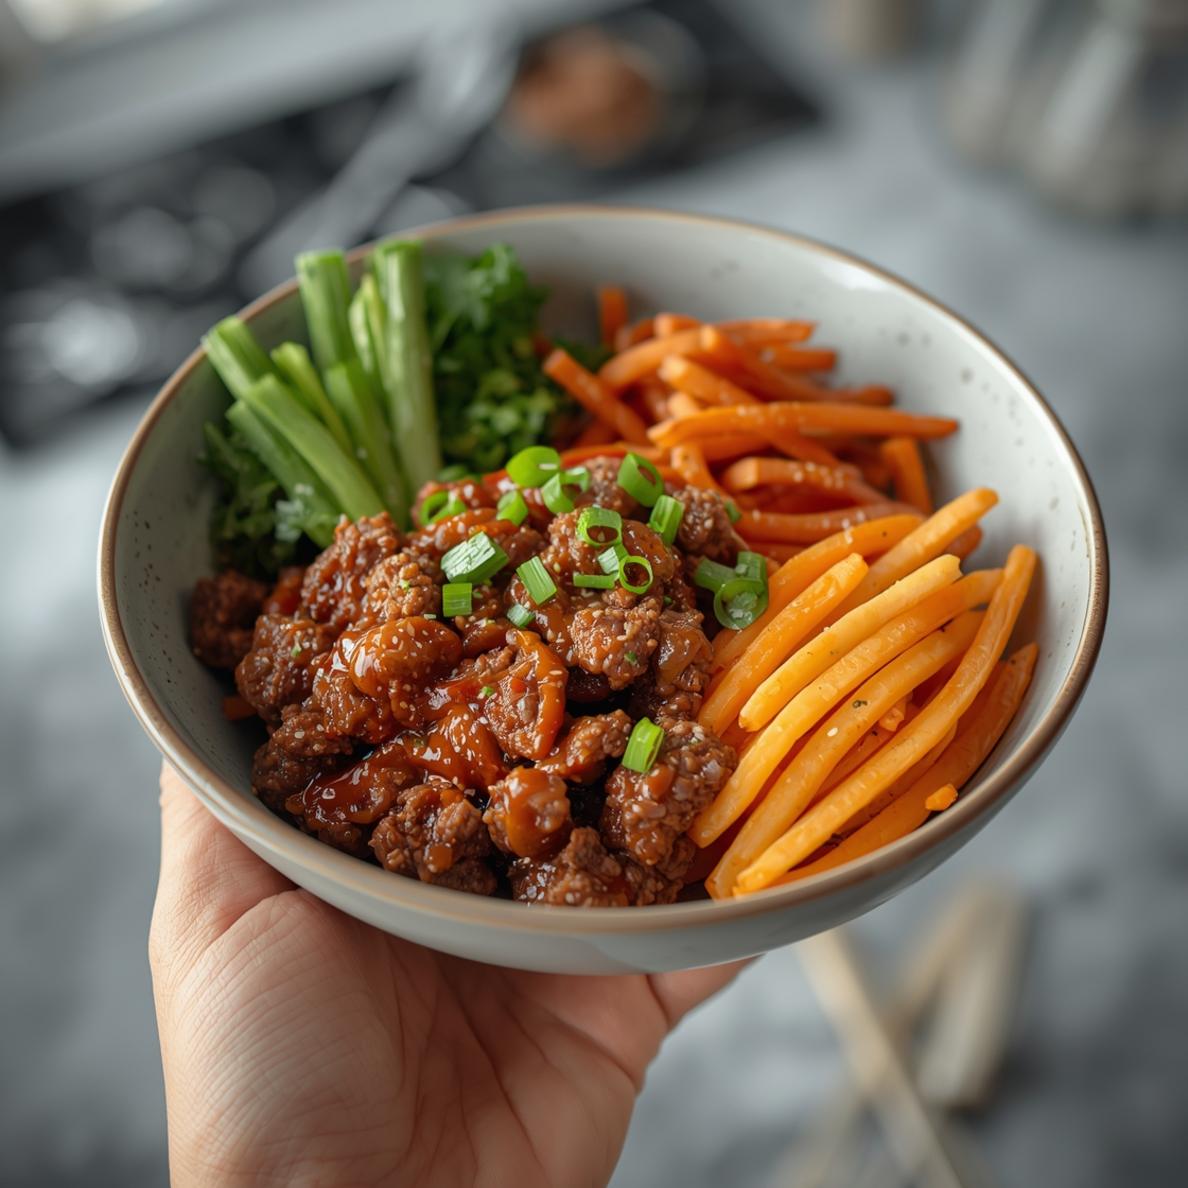
4. Finish & Serve: Remove from heat. Stir in most of the dark green onion tops, saving some for garnish. Serve immediately over a bed of fluffy white rice. Garnish with reserved green onions and a generous sprinkle of toasted sesame seeds.
Nutritional Benefits/Advantages
This bowl is more than just tasty; it’s a nutritionally balanced meal. Lean ground beef provides a high-quality source of protein and essential nutrients like iron and B12. When served over brown rice, you add a whole grain rich in fiber and magnesium. The garlic and ginger offer anti-inflammatory properties, while the sesame oil contributes healthy fats. It’s a complete meal with protein, carbs, and fats designed to keep you full and energized.
Tips, Alternative Methods, or Cooking Advice
- For Meal Prep: Cook a double batch of the beef mixture. It stores and reheats beautifully for up to 4 days, making lunches a breeze.
- Different Diets: Use tamari (gluten-free) and a sugar substitute like monk fruit for a keto-friendly version. For a lower-carb option, serve over cauliflower rice or leafy greens.
- No Stovetop? This can be adapted for an electric skillet or even cooked in a microwave-safe bowl by browning the beef in batches in the microwave (using a browning dish) and then mixing in the sauce.
- Boost the Veggies: Sauté mushrooms, zucchini, or broccoli in the pan before adding the beef for a more vegetable-forward bowl.
Common Mistakes to Avoid
Avoid these pitfalls to ensure your dish turns out perfectly.
1. Using High-Fat Beef: Lean beef (90/10 or leaner) is best. High-fat beef (80/20) will release too much grease, making the final dish oily. If you use it, drain the fat thoroughly before adding the sauce.
2. Burning the Garlic: Adding minced garlic to a very hot pan with the raw beef will cause it to burn and turn bitter. Always mix it into the liquid sauce, which protects it during cooking.
3. Skipping the Simmer: After adding the sauce, let it bubble and reduce for a few minutes. This step is crucial for the flavors to meld and the sauce to achieve the right sticky consistency that clings to the rice.
4. Overcooking the Beef: Once the beef is no longer pink, it’s done. Continuing to cook it after adding the acidic sauce can make it tough.
Storage/Maintenance Tips
- Storage: Cool the beef mixture completely before transferring it to an airtight container. Store separately from rice for best texture. It will keep in the refrigerator for 3-4 days.
- Freezing: The cooked and sauced beef freezes excellently for up to 3 months. Thaw overnight in the fridge before reheating.
- Reheating: Reheat gently in a skillet over medium-low heat with a tiny splash of water or broth to refresh the sauce. You can also use the microwave, covered, stirring every 30 seconds until hot.
Conclusion
Mastering this versatile and incredibly fast ground beef and rice dish is a game-changer for your weekly meal rotation. It proves that profound flavor doesn’t require hours in the kitchen. Whether you’re a beginner cook or a seasoned pro looking for a reliable staple, this recipe delivers satisfaction in every bite. It captures the comforting, umami-rich spirit of Korean cuisine in an accessible format, much like a simplified Easy Bibimbap. So, grab your skillet and give it a try tonight—your future self will thank you. We’d love to hear how it turned out! Share your creations or your favorite twist in the comments below. And if you loved this format, explore another fantastic version like this Korean Ground Beef Bowl.
FAQs
Q1: Can I make this dish spicy?
Absolutely! Increase the red pepper flakes to 1 teaspoon or add 1-2 tablespoons of gochujang (Korean chili paste) to the sauce mixture for authentic, adjustable heat.
Q2: What can I use instead of brown sugar?
An equal amount of honey or maple syrup works perfectly. For a sugar-free version, a brown sugar substitute like Swerve or Lakanto will yield similar results.
Q3: Is this recipe freezer-friendly?
Yes, it’s an excellent freezer meal. Freeze the cooled, cooked beef mixture in a sealed container or freezer bag for up to 3 months. Thaw in the refrigerator before reheating.
Q4: What are the best vegetables to add?
Quick-cooking veggies like spinach (wilt it in at the end), matchstick carrots, or thinly sliced bell peppers are great. Add them to the pan for the last 2-3 minutes of cooking the beef to soften slightly.
Q5: My sauce didn’t thicken. What went wrong?
You may have had too much liquid from the beef. Simply let it simmer for an additional 2-3 minutes uncovered, stirring frequently. The sauce will reduce and thicken as the water evaporates.
Tried this recipe? Rate it from 1-5
i love it
i really like it